Looking for Swag: Exploring Teechip.com
- coveredbytherose

- Sep 1, 2020
- 9 min read

Welcome to another tutorial brought to you by our team at Covered by the Rose. Today we are exploring the website known as Teechip.com and discovering how it can help authors with their need for merchandise commonly known as swag.
Everyone loves swag, but for those who don't know what it is....
Swag can include, but not be limited to, the following: *Bookmarks *Keychains *Coasters *Stickers *Coloring Pages *Banners *Activity Sheets *Posters *Buttons *Postcards *Magnets *Canvases *Mousepads *Coffee Mugs *Pillows *Jewelry *Car Decals *Blankets and more… If you can get your image on it, then you can use it for swag; and don’t be afraid to try out new things. Listen to the fans when they say "I'd love to get that on a mug..."or "Stickers would be awesome!" They know what they want, and now you do too, but where do you get things like swag made? There are tons of people on social media who have made it their business to make these things, and most create some pretty amazing things for their clients; but there are so many to choose from that they'll need their own blog post in the future. So, if you're reading this and you're a swagger, give a shout-out with your links so we can add you to that blog :) It's all about spreading the love! For now, I want to focus on a site called Teechip, which for me, has been an easy way to get the merchandise out there, without any up-front costs like you'd find with places like Vistaprint ( which is NOT a bad place to get your merch from if you don't mind the upfront costs! But we'll cover the how-to's of Vistaprint in another blog! Oh, I am going to be busy.)
For now, let me introduce Teechip... where you can upload your designs, manage your storefront and ship direct to customers, with no up front cost. It's like print on demand, for swag. You upload your design, choose your product and start your campaign. You will need an account to do this, but it is free to sign up an real easy to start your first storefront.

Before we go any further, I know there have been some issues with Teechip, but if you look at the complaints, they are not to do with the Teechip company at all, rather some of the clients using the platform to sell their goods; or, according to the complaints, sell goods with images that were taken from others.
Again, it is not Teechip selling your designs to other people, it is those people taking the image, as one would take from Google, and using it as their own. I have never run into this issue, but be aware, it does exist, just as it does on all other platforms.
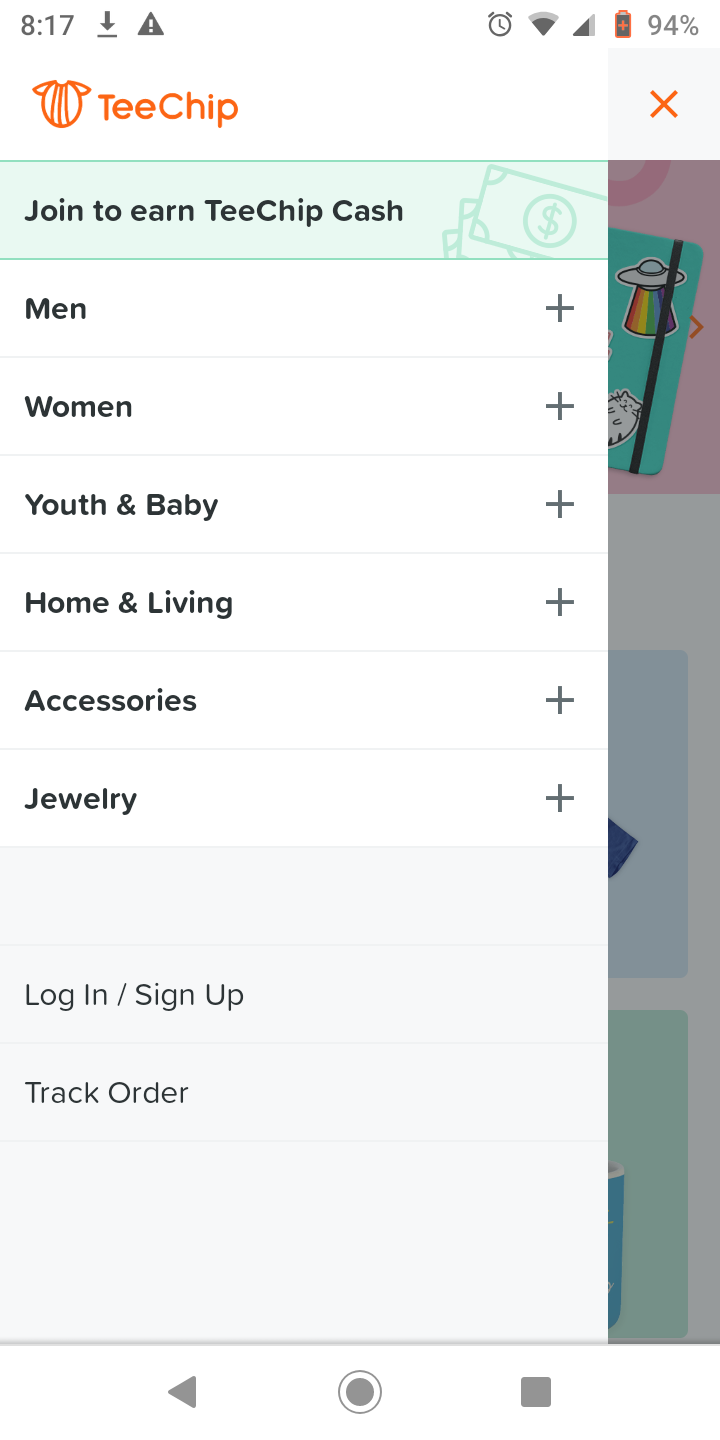
Contact Teechip and they will help you. Now, you see those three lines in the top left corner? Click on them and release the scroll down menu…..
***Again, if you do not have a Teechip Account, you will need to sign up for one. It is free and super easy!***

This is their main menu and from here you can shop as a guest and browse all that there is, or you can click the
LOG IN / SIGN UP button.
(Please note that I am using the mobile site to upload my design as it is easier to screenshot from my phone than it is to screenshot on my laptop. The web version may be slightly different, but not much. I suggest you browse both and find the best for you!)
>>> You can also track your orders right from the main menu, and yes, I have ordered from Teechip and love my mugs. There was a slight issue with the t-shirt I ordered, but their customer service team was right on fixing it. I'll do a follow-up post when the new item arrives. I'm not going to lie, I'm pretty stoked to have an office filled with my own signage :P

Once you've clicked the LOGIN /SIGN UP button it will take you here. Now, if you are wanting to purchase things from the Teechip Storefronts, you would sign in here, BUT, you are wanting to sell your designs on Teechip, so you are a Seller. Your login, is right below the big, black, bold letters that say Shopper Login.
You can then either log in as a seller and access your storefronts or create a seller account and set up a storefront from which to host your campaigns.

Your storefront will host all of your campaigns, allow you to add or remove items in said campaigns and show you how your sales are doing. It is also, where you create new campaigns...
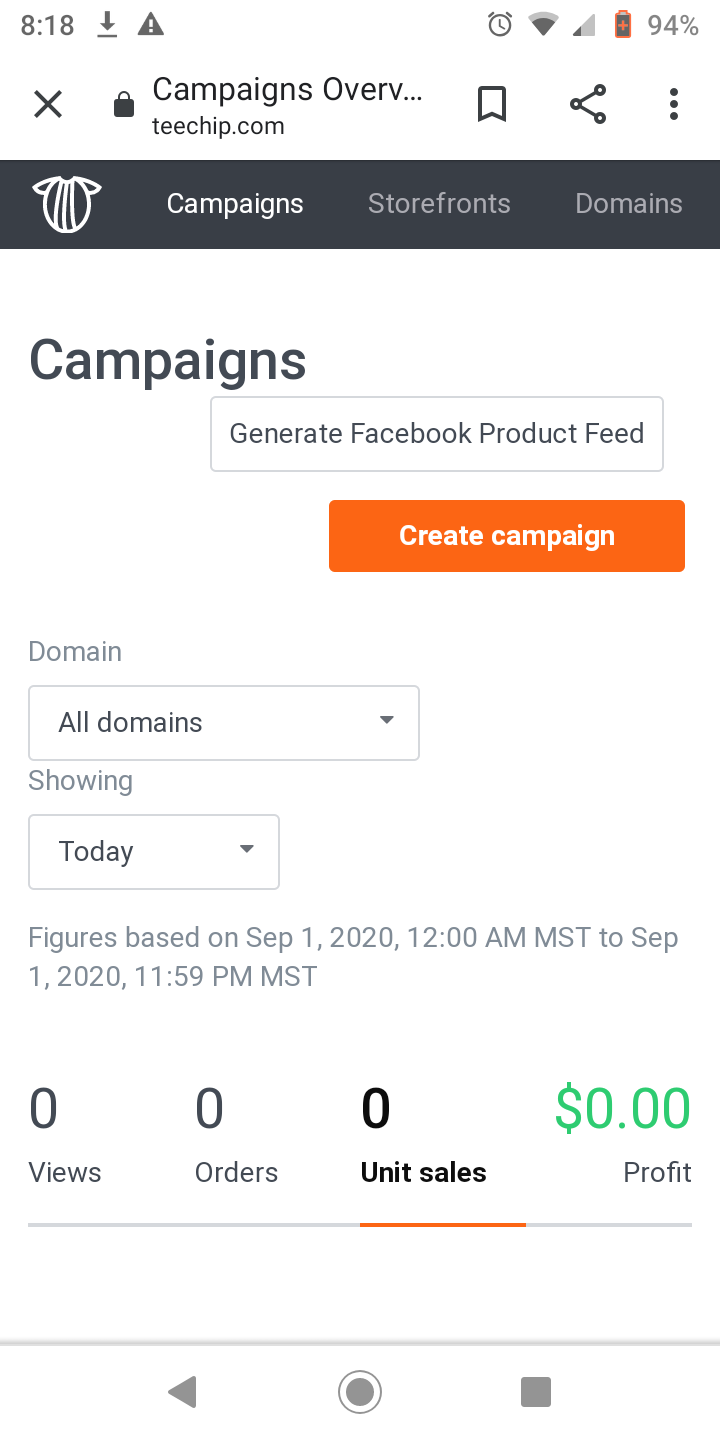
Once you are logged in and you are ready to begin your first campaign, you will see this bright orange box... CLICK IT!
*Please Note that a campaign consists of ONE image or design, that can then be used on many different things. If you have more than one image or design you wish to use, you will need to create a campaign for EACH design.*
Example:
Design #1 Flower- can be placed on mugs, stickers, magnets etc...
Design #2- Skull- can be placed on mugs, stickers, magnets, etc...
Both are different designs and both are different campaigns. A good way to see which designs are more popular than others.
Campaigns can be run for any length of time, and any profits will be distributed, as per your choice of receiving payments when setting up your storefront. You can re-launch campaigns, too, or run special holiday themed campaigns during the year. I know I have a Halloween design I want to add soon!
Now go ahead and click, Create Campaign and you'll proceed to the next step! Here, you will scroll through a list of products available from Teechip. Scroll on through and click on all that you'd like to see your design on. Pick as many as you like, just keep in mind that some of the products may have issues with your design that you will need to take care of later.

Hit continue when you are ready, and it is time to upload your design. Simply click Upload Artwork... They say you want your image/design to be 100DPI or higher. They are talking about the resolution. The higher the resolution, the better the quality when printing. I recommend 300DPI, which is what I set all my designs to, from stickers to full-wrap-around book covers.
An added note, as you will be selecting colors later for the material/fabric, if you want your design on a color background, you will want a vectored image (transparent background) or you will end up with a big white or gray box around your design. Talk to your designer or illustrator about a vectored image, or me, I can vector images too! Might need a tutorial for that too! Oh my... lots to do!
Anyhow, once you have uploaded your design, you are going to see a lot of little notifications next to each product you are attaching said design to. These are telling you that something is wrong, or has been missed and an issue needs to be addressed before proceeding. Don't Panic! It could be as simple as the product comes with two design slots (front and back) and you have not set the back one yet! Or, as stated above, your design will not work, at the current sizing or resolution, on that specific item. If you really want that product in your storefront, then you will have to resize the image to their specs. If not, remove it from the list and carry on. You can always update or relaunch your campaign later with different additions to your product list, by visiting your storefront homepage.

DON'T FORGET YOUR BACKGROUND COLORING. Some items offer a choice of colors offered, just click the circle with the + inside of it to play around with your options.
**Remember, and you can see what I mean above with the gray box surrounding my image (Which was left there on purpose) if you do not want that gray, white, black, etc box around your image on the colored fabric, you MUST talk to your designer about vectoring your image.
Remember that blog I did about Pesky Pricing, I should have done one for this. I hate pricing items, but this list sort of makes it easier. There is a set base price in the first column, followed by a price you set as the lowest sale price you agree to. You can change this by visiting your storefront homepage and editing the content of that specific campaign. We will go over this is another blog as this one is already getting long. Don't worry, we're almost done!

Base Cost, Sale Cost, Expected Items to be Sold... I leave it at 50, as it really only helps tally the last column, which is your projected sales should you sell that many during the campaign. I only play with the second column, and set the sale price as low as it can go. Really, I'm not in it for the profit, I just want people sipping out of mugs with my doodles on them. If you want to make a good profit on this, you'll want to do some math and set custom pricing to benefit your goals.
Note, that the sale price is the lowest they will sell your item for, and is set by you, it is not the actual price customers will see when they browse your store. Example: You set the item for $14.00 as your lowest sale price, Teechip advertises it as $25.00, with an on-sale discount of ??? making it $16.50. So that fancy, color-changing mug is $16.50 + shipping, shipped direct from company to the purchaser.
(There are deals and discount offers, and bundling and such that you can offer to fans and clients in newsletters and on social media to lower the price even more, but we'll get there shortly) Bottom line >> that sale price is not the actual price of the item. I am looking into this further, but so far, I haven't come across any problems!

Once you are happy with your pricing, you can hit continue and move on to your Campaign information. You'll want a title and a description so people know what it is they are getting.
The URL is the link to your campaign. Click the down arrow and choose your starter link, then add in the name of your design. Example:
Teechip.com/CoveredbyRoses
That is what I chose for this design. You will also want to link it to the storefront. (You can host more than one storefront on your account. I have three. You can access them on your account dashboard) Type in the storefront you want to link it to and carry on to category tags. Choose from the scroll down lists as you type.
Oh boy, Conversion Tracking. I avoid this, as I don't really need it, but again, if you really want to go hardcore on this venture, it might help playing around with them. Since we aren't going to do it now, I'll save those for another blog tutorial.
If you want to sell to the public, you'll want to click public. If this is for a private event, then hit private.
Now we get to the Up-Sell, which is where the deals and bundles come in, located towards the bottom of the page.

Bundle and Save: Discount the purchase of two products together. Choose the products to bundle and how much the discount will be.
Related Products: Choose the products you want shown when the customer is browsing your items.
Post-Sale Pop-Ups: This offers your customers a chance to add on to their order before they leave the site. They offer items that would accompany your current purchase as discounted prices. You can link up to four other campaigns with different designs this way.
Post-Sale Email Up-Sell: This will send them more items to view and purchase with more discounts, once they complete their order. Again, it allows you to link campaigns and up-sell. You can select a campaign to add to these.
Post-Sale Order Confirmation Email Up-Sell: This gives yet another chance to find more goodies at discounted prices on other campaign items, and it will be attached to their order confirmation email from Teechip.
**By creating a campaign, you agree to the terms of service, so make sure you read them first. Located at the bottom of this page and highlighted in blue.**
Once you've agreed to the terms and created your campaign, you can browse your storefront and the products available. Here I have grabbed shots of a bracelet, hoodie and 3/4 sleeve shirt. I have a hoodie on the way, even as we speak!
If you look close you can see the mugs and tumblers on display too! All you need to do now is share the link to your storefront and wait until your campaign ends. Remember, all profits are sent out at the end of the campaign, so whether it is 2 weeks or 2 months... it's your choice. You can always relaunch the campaign again later!
We are nearing the end of our blog post, but don't worry, there will be more coming. If you have any questions until then, why not chat with Teechip. They are pretty cool with the customer service and quite helpful. There contact info is listed below!

If you want to get a look at what a Teechip storefront looks like, you can visit min Just click on the link below and have a peek.
Until next time, when we take a look at what Vistaprint has to offer!!


Comments